Sunday, June 7, 2009

High Gloss Black bike bits

Did some bike bits for a mate of mine's bike in Finishing black.
Came out very shiny.


Tuesday, May 12, 2009

Making an OEM Golf 5 GTi enginecover to fit over an aftermarket Cold Air Induction kit


The popular Golf 5 GTI is not often kept standard, due its brilliant 2.0TFSi motor that responds so well to any modifications.

One of the many modifications that are easy to do is the Cold Air Induction Kit. But with this new modification, comes a slight drawback, the stock engine cover can not be refitted.

Here's how the engine looks in stock form


Here is the Neuspeed CAI

Here is an example of a CAI in a GOlf 5 enginebay. As you can see, the engine does not look as neat as with the enginecover fitted.

And with the current exchange rate, it is damn near impossible to import an aftermarket carbonfibre engine cover for a decent price. Below is an example:

So, what is the solution. Take the stock enginecover, and cut it up! Yes, thats the answer. With a new OEM Golf 5 enginecover going for about R2500 at a VW Dealership.

So, i was handed the stock Engine cover by a friend of me who owns a Golf 5 GTI, Sean, to cut it up and make it fit his enginebay. Luckily, another friend of Sean, Corne, had already done the hard work of cutting and fitting on his enginecover. So to make Sean's engine cover, would not be so difficult, as i already got a "template"

Below left, is the already painted (Painted by Maldino Customs' Aldo Rollandi)and cut enginecover from Corne, and to the right is Sean's un-cut, un-painted cover.

And after meticulously and carefully cutting the R2500 cover, this is how it eventually turned out
So this will be a nice solution to the ugly and exposed engine bay of a modified MK5 GTi

Saturday, May 2, 2009

Citi GOlf rear bumper smoothing

This is the rear of a Citi golf. I decided to smooth the back bumper a bit. This is the progress pics, and i'll let them do the talking.


Fibreglass sheet cut to size

Applying the polyester resin
Thin layer of body filler applied
Primed and ready for paint


The end result
Thanks for taking the time to read. Contact me for May month spray specials

Monday, February 23, 2009

Storm Beige Citi Golf frontal

Here is Donnavans Citi golf which which was recently involved in a bumper bashing. As seen here, the bumper he replaced the smashed on with is unpainted

Donnavans bumper is a VW OEM part, unpainted and raw.
The Work begins
If compared to the first pic, you can see that I had to cut the middle part of the bumper out, in order to fit the new spec Citi golf bumper grille. Pics of that later down in the post.

Here is the bumper after a noticeable time of sanding...

On the A-frames, and just painted with the ever so important Polypropylene Primer (plastic primer)

Thereafter, the Storm Beige Base coat was applied...


And after a couple minutes of drying, the clear coat was applied to ensure a healthy bit of shine


Here, the newer spec VW Citi golf front bumper grille is fitted. Its a wee bit of a mission, so i'd advise guys wanting to do this to think twice!

It fits nice, and rounds off the bumper well!

Unfortunately, as seen in the pic, the lower valence from the Golf II 16v is not made for a Citigolf, therefore, after fitment of the lip, there is a gap between the two pieces of the lip, right in the middle

The Golf II 16v lip is not made for a MK1 bumper, so the ends needed to be trimmed.

Before:


After: Nice and flush


And a pic of the bumper completed, with numberplate and indicators refitted!

It shines, and its smooth...

Monday, February 9, 2009

VW Golf MK IV Colourcode

Graeme brought me his 2003 Golf 4 1.6i for some colourcoding.
I had to paint the front and rear lower valences, front and rear bumber rubstrips and the door rubstrips...

Here's a pic of the front valence with real damage to it.


Front and rear lower valences sanded and fixed


Ready to paint the plastic primer:

Plastic primer applied. (Silver-grey colour)


Painted with MS Primer and sanded smooth to rid the parts of the nobblie texture that it came out the factory with:

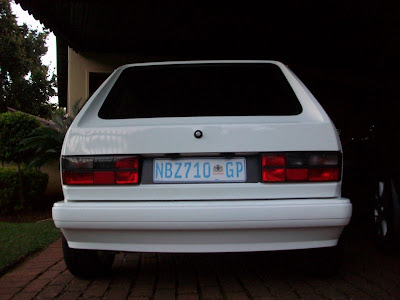
And after the base-coat, clear coat and refitment, the end result looks kinda neat! Subtle yet effective changes is what makes the difference:

Shiny